Placing Orders Overview
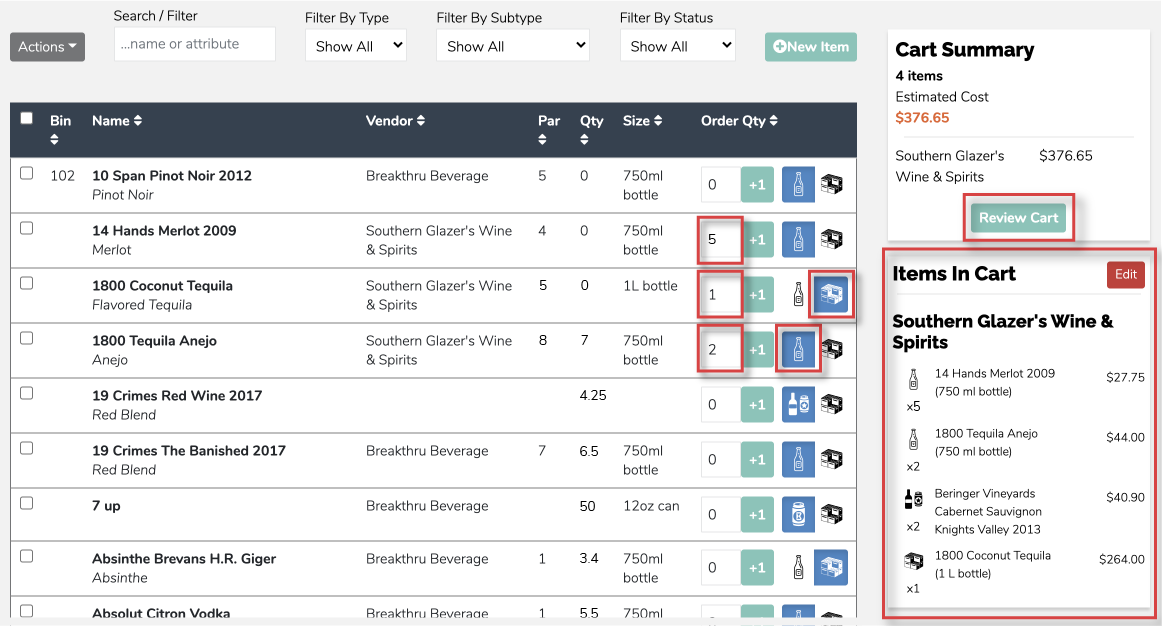
Orders in Backbar generate a purchase order which is then emailed to your vendor sales rep or contact. First begin by going to Orders > Build Orders in the left hand navigation panel. You will then see a list of all of your items.
On the far right of each item row is an input field for a quantity. This is where you enter the quantity you want to order of that item. The amount automatically saves each time you add or change a number. To the right of the quantity input it a toggle for if you want to order by the individual unit (ie. can, bottle, keg) or by the case. As you add quantities for items, you will see them populate on the right sidebar underneath Items in Cart.

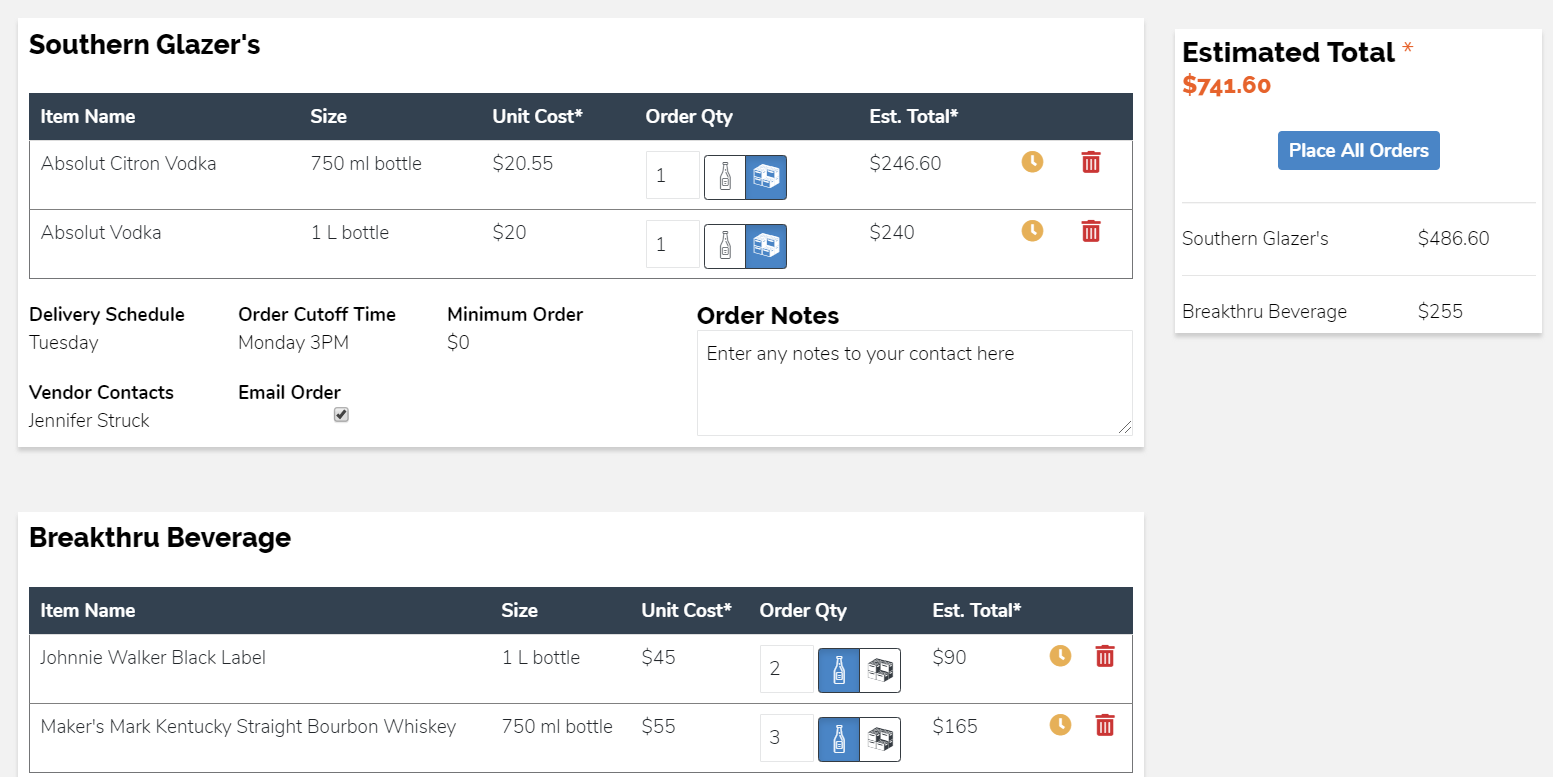
Once you have items in your cart you can view your shopping cart by clicking on the Review Cart button or by selecting Orders > Shopping Cart in the left hand navigation panel. You will then see a list of items in your shopping cart organized by vendor. You can modify any of the quantities or if you want to order by the unit or case.
Within each vendor area, below the items on the order, is some other information for the order. By default, any contacts you have for the vendor will be checked to be emailed the order, however if you do not want to email the order to one or more contacts, uncheck the box next to their name. Note if no contact is checked, the vendor will not receive the order. There is also a field for Order Notes. Use this field to tell any notes to your contacts who will receive the order.
In the right side bar you will see the Estimated Total and estimate for each vendor. Note this is an estimate based on the costs you have entered into Backbar. This estimate does not reflect what you will actually be charged. If you do not have costs entered at all for any items, the estimate will not include those costs and will be low.

When you are ready to send your orders, click the Place All Orders button. A purchase order number will be generated for each vendor. Each vendor will receive an email with the order listing the items you want to buy. You will be copied on the email as well so that you know your vendor contact received it. You will also be listed as the reply-to address on the email in case your vendor needs to reply to ask a question.
Once you place your orders, you can find them by going to Orders > Order History in the left side panel navigation. Remember that once you receive your orders, you must go to the order and click Confirm Delivery Received to close the order and add it to your inventory. If the order is left open in Backbar, your reporting will not be accurate and your product usage and excess inventory cannot be calculated.
You can place orders for any vendor so long as they can receive orders via email. This is virtually all vendors. If you are in a control state, see can I place orders in a control state.
However, your item must have a vendor assigned within Backbar. Otherwise we do not know where to send the order. First, setup your vendors by going to Orders > Manage Vendors in the left hand navigation panel. There are three ways to assign vendors to your items (in order from easiest to hardest):
In addition to having a vendor, each vendor must have a vendor contact with an email address. This is where the order will be emailed to. If there is no contact and email address, the order will not be sent.
Lastly, each item must have a size specified. Because items may be available in multiple sizes, this must be specified to the vendor. You can set the size by clicking on any item within Build Orders or Inventory Items and towards the bottom of the page select the size, units and container.
